So of all the things we keep, what matters most? The things collected over a period of 30 years or so that occupy space here and there in this humble abode are about to be culled. A decluttering of sorts. Those little items that have been saved and stored away because " I can use that in this widget" or "This still works" or "When I loose the ten (!) pounds that was gained over the holidays two years ago, I can wear this outfit." And on and on and on it goes. This is valuable real estate that I could "rent" out to my fabric stash and sewing adventures (projects). So a couple of cardboard boxes, maybe more (certainly), will be filled with some items of clothing, books, and who knows what else to be donated. Things that are NOT being used by me or anyone else in this dwelling that could be things that could matter to somebody else.
We justify and find or create reasons why we keep things. Make room for the things that really matter in your life.
Completed in the Spring of 2017... hooray! Now I'm looking to purge even more!
Saturday, June 23, 2018
Sunday, May 29, 2016
More selvedges!
A while back I posted about selvedges and what could be done with them. I have come to realize that some things take time (duh). Going along the sewing pathway I pick one, then another. They are in a big bag. Waiting. Waiting patiently for their turn to be added. To be a part. Of something bigger. Many are new and have a place to belong. For now. As these pieces are to be added to each other.
I have completed some potions by color coordinating the fabrics while attempting to make those parts random.
The selvedges are coming together very nicely. I think this cloth is going to make a very nice and hopefully sturdy quilt top. I can't wait to see it completed. It's a great record of the stash of fabric that I have curated.
Still there is a way to go before it us completed.
In the meantime I have been using up some others fabric pieces of odds and ends to make larger pieces of cloth. I may turn them into art cloths for my own keeping, we'll see.
Saturday, March 5, 2016
Creators create, we can't help it.
We are already into March, time goes. Faster and faster it would seem. My New Years resolution so far has been somewhat successful. I only told one person about it - DH. Now I will share - my sewing area is so crowded with ??? That I feel the NEED to organize, clear, make room. This is being done, only at a snail's pace. Progress is being made though and is only part of the story ... I have imposed upon myself NOT to purchase any supplies or fabric until the job is done, YIKES! So far this year I have not purchased one fat quarter, no thread, not a single needle! I am starting to feel some withdrawal. How do I combat this, you ask? I head into my sewing area and start by picking out what I want to accomplish in there. I feel much better afterwards in a couple of different ways, one this or that item(s) has a place to live or gets to "move" out, so to speak. Second I have not added to the stash, third is that I get to discover UFOs or WIPs (of which there are a few), fourth the satisfaction that soon I can get in there and start creating again - not that I have been stagnant. Creators create always, we can't help it. I have been doing some hand sewing and stitching and working in my small sketch book. Already have some ideas that I will transfer to fabric starting small increasing to a larger piece. More on that in a future post.
How are all of you doing on your New Years resolutions?
Sunday, December 27, 2015
Hello everybody, it's been quite some time since my last blog post. Hope that everyone has had a wonderful year and wonderful times with family and friends during this Christmas season. This year everyone was at the house later in the day. We all sat around the table having coffee and Christmas goodies, laughing and joking. Afterward everyone retired to the family room, gathered round the tree and exchanged gifts. The addition of an advent calendar was part of the festivity for the first time. Everyone was involved as they contributed to what was in each little bag. No one knew what was in each bag that they picked, it was just a random collection of things. Everyone had fun and wants to do it again next year. I have already begun with my first contribution!
It is very warm in New England as we are used to it being a bit colder. I'm very sure that winter will be upon us soon and the snow shovels may have to come out!
This year my "sewing room" needs a good going through - it is quite the disaster. Some parts are organized while others are in disarray. It's very hard to find things, especially when I know I have more than one of an item. I go in scratching my head asking myself where in the world are my pinking shears for example. That happens to be one thing that I do not have more than one of. I know they are here somewhere! So the best thing to do is to get in gear and get going, get organized. Stop procrastinating.
Other goals are to compile a book of quilts that were specially made for a certain group of people. That will begin shortly after the new year. I am looking forward to this small project and cannot wait to see my idea complete. I am very excited about this.
I am making a red, white and blue quilt for some one special, it is nearly done. It needs to be completed by January 30. My next project along this line is going to be creating a quilt with ONLY American sourced fabrics. Not sure if it will be a red, white and blue quilt yet, I have not decided but am leaning towards that thought.
I have some baby quilts completed that need to find a home. A pretty princess baby girl quilt of pinks and grays and a couple of variety holiday quilts that would be great for little boys are in the stack as well as some half square triangle quilts. They all need a new home.
I was excited to meet Mary Fons this past November. She has a great sense of humor and shared a lot of her quilting knowledge with the group. She had some interesting tidbits of quilt history to impart with us and a nice array of her own quilts to show. It was a lot of fun. Everyone seemed to have a good time, I know I did.
Well the newest addition to our house is crying at the door to go out and take care of a little business, so I hope you have enjoyed this little catchup, I'll be posting again soon. (Another one of my goals - post more often as it helps me keep on track).
Thanks for reading. Happy new year.
Saturday, May 24, 2014
Small Finds
As you stroll around the beautiful Gaylord Resort in Nashville Tennessee you hear the soft sounds of water gurgling past and cascading waterfalls as fish glide through the clear water environments that have been created for them. There are plants of every shape and size enclosed within the expansive greenhouse that lets in the natural light. Benches are scattered throughout for those who might want to just sit to take a moment of contemplative relaxation. There is so much to see here. If you ever take a trip to Nashville make sure that this is one of the places that you venture to.
.
.
 |
| One of the many pieces of statuary scattered throughout the Gaylord Resort in Nashville. This little barefoot cherub was waiting patiently on a small bit of log for us to arrive. |
Sunday, May 18, 2014
Making Rainbows
 |
| A rainbow of soft color. |
Anyhow these are 1 yard of cotton fabric each that I hand dyed and they are lovely, even if I do say so myself. Soft and cozy. I have 20 yards plus at this time and each one is slightly different from the next. If anyone wants to see a picture of a full yard please leave a comment.
Friday, October 11, 2013
What's Been Happening?
It has been a couple of months since my last post as you can see - so what have I been up to you ask? Well for starters a wedding shower, rehearsal dinner and wedding. which went beautifully. The bride was beautiful and the groom looked very handsome - they both were smiling the whole day.
Now we have a daughter-in-law the newest family member AND a son-in-law both of which we love very much and are welcomed additions to our family. So now both of our kids are happily married.

 Above is a couple of pics from the rehearsal dinner. This is the table setting at which the actual practice ceremony took place. The colors for the wedding were purple and grey - so I kept that theme for the dinner as well. I will have a tutorial for the table runner in a post later this month, so check back to see that.
Then the surprise birthday party - which was quite a feat trying to keep it a surprise! We succeeded in that endeavor as well - DH had no idea that this was all going on behind his back LOL. With only 3 weeks to set everything up after the wedding we all were very busy indeed. He enjoyed himself very much and was totally surprised. The trick is to just go about the normal everyday activities that one does AND get help from the kids to do some of the set up and preparation. They did a great job setting up and everything looked fantastic.
Now it is time to think about the holidays which are fast approaching.
Now we have a daughter-in-law the newest family member AND a son-in-law both of which we love very much and are welcomed additions to our family. So now both of our kids are happily married.


Then the surprise birthday party - which was quite a feat trying to keep it a surprise! We succeeded in that endeavor as well - DH had no idea that this was all going on behind his back LOL. With only 3 weeks to set everything up after the wedding we all were very busy indeed. He enjoyed himself very much and was totally surprised. The trick is to just go about the normal everyday activities that one does AND get help from the kids to do some of the set up and preparation. They did a great job setting up and everything looked fantastic.
Now it is time to think about the holidays which are fast approaching.
Wednesday, July 24, 2013
Update - Spray Starch
In April of this year I posted about home made spray starch. I am pleased to report that it works quite well. There isn't any sticking or flaking, but I must admit that I usually am ironing with steam. I find that I get a better result with steam, and ironing lines in just always come out just the way I want them. By lines I mean what people used to do down the front of their slacks (I don't iron seams / lines down the front of my pants- they never even see an iron!)
The one drawback is that with all this HOT weather the nation seems to be having the starch may begin to smell a bit unpleasant and you do not want to iron in bad odors to something beautiful that you are making - so smell the starch first. And yes I did add some borax to the solution to preserve it. So now the starch is kept in the refrigerator with a nice label on it "STARCH". It also washes out quite nicely without damage to your machine.
So give it a try - I'll bet that you have some corn starch in the kitchen cupboard - add some cold water to dissolve the corn starch - bring to a boil while stirring constantly to avoid lumps - allow to cool before funneling into a spray bottle. You can use it immediately, store any unused portion in the fridge and make sure that you label it.
*Note you don't need much corn starch in the water - opt for less rather than more. A half teaspoon to a pint of water is a good start. If you find that you require a heavier starching add only a quarter teaspoon more mixed with a tiny bit of water to the main solution. Add the borax to a small bit of water - then mix into the boiled starch.
I hope that this was helpful, it certainly is economic. .
Thursday, July 4, 2013
Happy Birthday America!
I love this country! We have freedoms many other places in the world do not. We can worship freely without persecution. We can dress the way we want. We can keep company with our friends with out fear of violence put upon us. We can hold office, we can vote. We can express our thoughts. We can do anything we want...as long as we are not hurting or harming others we have these freedoms. Enjoy all that you have and all that you will be.
It is because of the many patriotic Americans have fought and died to obtain and hold these freedoms - from the time our country was in it's infancy to this day. It is because of this collective sacrifice that WE THE PEOPLE are able to freely celebrate another birthday in and of America. Thank you to all those who have given and to all those who have given ALL.
It is because of the many patriotic Americans have fought and died to obtain and hold these freedoms - from the time our country was in it's infancy to this day. It is because of this collective sacrifice that WE THE PEOPLE are able to freely celebrate another birthday in and of America. Thank you to all those who have given and to all those who have given ALL.
Wednesday, May 22, 2013
A Nice Drive in the Country
With the economy being what it is a nice drive in the country would be lovely. You could make a day of it, pack a nice picnic lunch and bring some cold homemade lemonade to quench your thirst. Hop in the car and off you go to the Norman Rockwell Museum. It's a nice drive if you live in Massachusetts or one of the nearby states. There are lots of antique shops along the way to stop at that you can meander around in and stretch your legs a bit while your at it. The museum is located in Stockbridge, Massachusetts among rolling well manicured lawns, with surrounding beautiful views. The studio is on the grounds as well and you can go through it and see where the artist sat and created many of his works of art. The museum showcases an array of front page Saturday Evening Post artwork done by Norman Rockwell. Pictured here is the studio and grounds, but to truly appreciate it a visit is a must. The nearby town of Stockbridge is lovely as well and worth a visit if only to walk about. It's just the cost of gas (which, yes could be considerable depending on what you are driving and how far) and a days worth of time well spent, and a picnic lunch. Hope you will take the trip and have a great time.
 |
| The Studio |
 |
| Not sure if memory serves me correctly - but I think this is the house. |
 |
| The Museum |
Sunday, May 5, 2013
Yellow Pop!
How about a little yellow pop? Aren't these yellow azaleas pretty? They add just the right pop with their vibrant sunshine yellow. Consider adding a little pop to one of your quilts, you won't need much as a little goes a long way. Try it, you'll like it.


Wednesday, May 1, 2013
A Christmas in May Quilt

 Her goal was to make a quilt for each one of her children before she opened the door to the quilting room in heaven. She was mom to eight kids. She pieced her quilts on the machine after painstakingly measuring and cutting each individual piece by hand. Once the top was sewn together she would make the sandwich layers, baste them together and get started with the quilting. Hand quilting I might add.
 When she was all done making the eight quilts she presented them at Christmas that year. Everyone marveled at the accomplishment. In true mom style, she put a number on each quilt and a corresponding number on a piece of paper in a paper bag and all eight kids drew a number from the bag. Here is the quilt that corresponded with the number for our family of four.
Tuesday, April 30, 2013
Au revoir Avril

A couple of accomplishments this week and a nice way to end the month of April. First the flannel lap quilt is completed and I am quite pleased with it. I wanted a no fuss quick quilt to do up and have achieved just that. To go along with it I have created a tutorial to share with my followers and viewers. It is a simple quilt and easy for beginners. Even the binding is super easy. Anyone can do this. See the pictures following. I used a charm pack by Bonnie and Camille called Marmalade for Moda. Nice and soft flannel, it would be great for a baby shower gift. You can see it pictured in my post from Jan 6, 2013 in the box on the left hand side. It is quite nice fabric. The backing is a Riley Blake fabric by Carina Gardner, Dainty Blossoms pattern F2760.

42 strips cut into 5" x 2" (strip A)
42 strips cut into 6 1/2" x 2" (strip B)
1 strip cut into 45 1/2" x 2" (strip C)
1 strip cut into 51 1/2" x 2" (strip D)
2 yards batting of your choice
2 yards backing fabric
Note that strips A thru D are all the same fabric, you will need about 1 1/2 yards of this fabric.
I hope the pictures posted will help.
 | |
| Charm squares with strip A along the top edge. (diagram 1) |
- Lay out your charm squares in a manner that appeals to you, on the top edge match strip A to each square (diagram 1 above). With right sides together stitch edges using a 1/4" seam allowance. Press all seams toward the outside edge - be careful not to stretch your squares out of shape as you press (diagram 2(. Note do not cut your stitching between each set and this will keep them in the order you have selected - in other words chain piece.

diagram 2 - Next place strip B to the right side of the strip/square set. If you prefer the left side that is okay - but keep all of the B strips on that side (diagram 3). Stitch 1/4" seam allowance using the chain piecing method. Press all the seams toward the outside.

diagram 3 - Now you should have 6 or 7 rows of blocks. You can number each row 1 thru 6 or 1 thru 7 to help keep them in order. Take row 1 and 2 right with sides facing and stitch together. By now you know that all the seams are 1/4" wide. Continue in this manner until all the rows are sewn together.
- Next take strip C and sew it along the shorter edge of the row that does NOT have a border. I like to pin mine at the center and at each end as well as along the rest of the edge so that the seams are kept down in the direction they are pressed. Also that allows me to make adjustments if needed. Do the same with strip D.

- Your top is now completed. Lay out your backing fabric right side down, place the batting on top of that. Your pieced top will sit on top of the batting. Baste your quilt sandwich together. Then go have a sandwich yourself, take a break and stretch!
- If you have a walking foot on your sewing machine this would be a good time to use it. Stitch in the ditch up and down each row. Always start your stitching first in one direction then from the opposite direction - this will help keep your quilt from shifting.
- Bind your quilt!


Tuesday, April 23, 2013
Something New
Today I am trying something new - home made spray starch. "Why?" you ask. Mostly because I am too lazy to go out to buy some and partly because I don't want to spend the money. So yes, lazy and cheap. I have found that I am not the only one making my own spray starch though, as there are recipes that are around to make it. I'll let you know how I make out in a little while....
and actually, next week is sewing week for me I can't wait and am preparing this week so that all the projects are set up and ready to go under the needle! Having this starch is just part of the preparation process.
I made maybe too much of it (I think) as I put 3 teaspoons in cold water to dissolve and then heated it, adding more water to make it thinner as needed - during the week I will be using it on fabric
Friday, April 19, 2013
Wednesday, April 10, 2013
I Wonder Wednesday
Today my thoughts are on thread and whether or not I should use a variegated thread on the back side of the quilt shown in the previous post. The top will have a solid color thread but the back is a solid color so to add interest maybe the color should be from the multicolor thread design that the quilting will make. Any thought on this from readers? Has anyone done this? What were your results and were you pleased with them?
.
 |
| This is just my wooden spool collection some of which were my mother in laws, thanks Ida. One time in the not too distant past all thread came on wooden spools, now I don't think that there are any that do. Do you have a wooden spool collection? |
Saturday, April 6, 2013
Saturday Stitches
This is today's progress, not really a lot but I am "sketching" out my stitch layout for this next small quilt that I am working on. Not sure if you can make it out very well. Here is what you are looking at a large piece of clear vinyl overlay with the pattern drawn on with erasable marker over the quilt top. This gives me an idea of how the stitching can be done on the machine. It helps a great deal, when the quilt is rolled up on the bars, I don't always remember exactly what I wanted to stitch in a particular area. This way it's all there for me as a reference once the final decision is made as to pattern.
You can buy the vinyl in most fabric stores or hardware stores. There are different thicknesses as well, choose what works best for you. Any erasable marker will work, just make sure that when you are finished with the design that it is well wiped off so that the next quilt isn't soiled.
Take a look.
 |
| The black lines are drawn onto the clear vinyl. This gives you the idea of what the stitch pattern may be, of course at this point you have the option of change and experimentation without ripping out stitches. |
 |
| Here are some of the experimental ideas that I am playing with. These are from my sketch journal. Click on the pictures to have a closer look. |
Monday, April 1, 2013
Pasquetta
In Italy the day after Easter Sunday is celebrated as Pasquetta or Little Easter. So in honor of this official Italian holiday Buona Pasqua! Enjoy.
 |
| Warm and delicious home made by Erran, Pecan Cinnamon Rolls, nice and sticky and then... |
 |
| Little Peeps Chic and Bunny with eggs basket... |
 |
| and their friend the Easter Chicbunny. Created by the very talented Miss Sarah. |
Sunday, March 31, 2013
Happy Easter
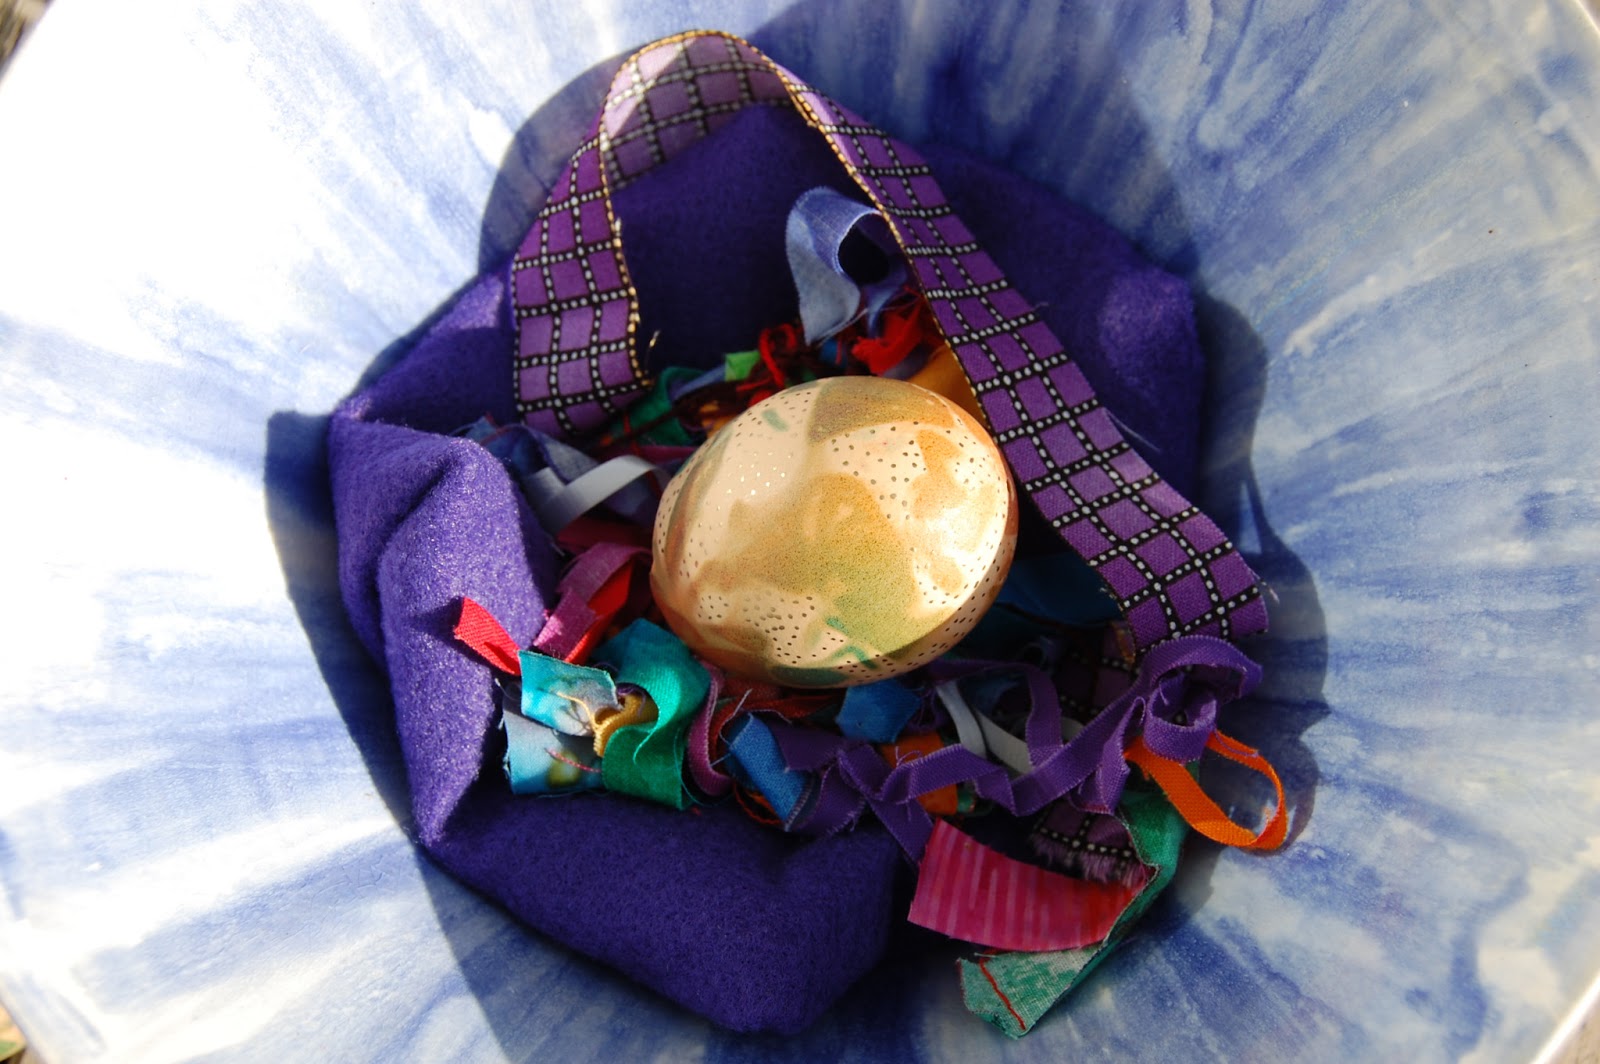 |
| Brown eggs, hand painted by me. |
 |
| and now another one |
 |
| and then another one. Click to see a close up. |
1, 2, 3 look what the Easter Bunny left me
and in a nest of fabric scraps!
Thanks Easter Bunny.
Seriously though, Easter is a time of re-birth, the day Jesus is resurrected from the dead as promised by God the Father.
Happy Easter Everyone!
Saturday, March 30, 2013
Better Pictures ... maybe
 |
| quilt front |
 |
| Quilt front |
 |
| showing a section of the back |
 |
| close up of half square triangle strip |
 |
| mitered corner binding |
These pictures show a more accurate representation of the colors of the fabrics used in this serendipitous lap quilt. (See previous post and you will see what I mean.) I love the "bird footprints" on the blue and the little dots of color on the other blue fabric. I just kind of threw them together with out thinking and they worked. The red pieces are there because I need extra length and the half square triangles were to match the front of the quilt that this piece was originally made for. That particular quilt is just waiting to have a binding sewn on. Then I will show it on this blog. The quilting was done on the idea of the lines that form the square pattern of the binding and matching fabric in the body of the quilt. Hope you like it.
Subscribe to:
Comments (Atom)
LinkWithin
